The Tools page is comprised of the following elements:
- Library - create, import or explore within a list of articles
- File upload - import lists of gene or protein symbols to explore
The Library tool helps you search PubMed, create a list of articles and export your list to a file to be stored on your computer hard-drive. You can also import a file from your hard drive and display it in a table. In addition, lists of articles can be used to form a concept map and Focus in the Explorer window.
When you click the Library link on the Navigation bar in Tools a panel will open with four options:
- PubMed Search - Search with a concept or Expert name to generate a list of articles
- List of articles - View list and select articles for Export
- View article - View an article
- Library basket - Import or Export a list of articles or generate Explorer search with concepts found in article list
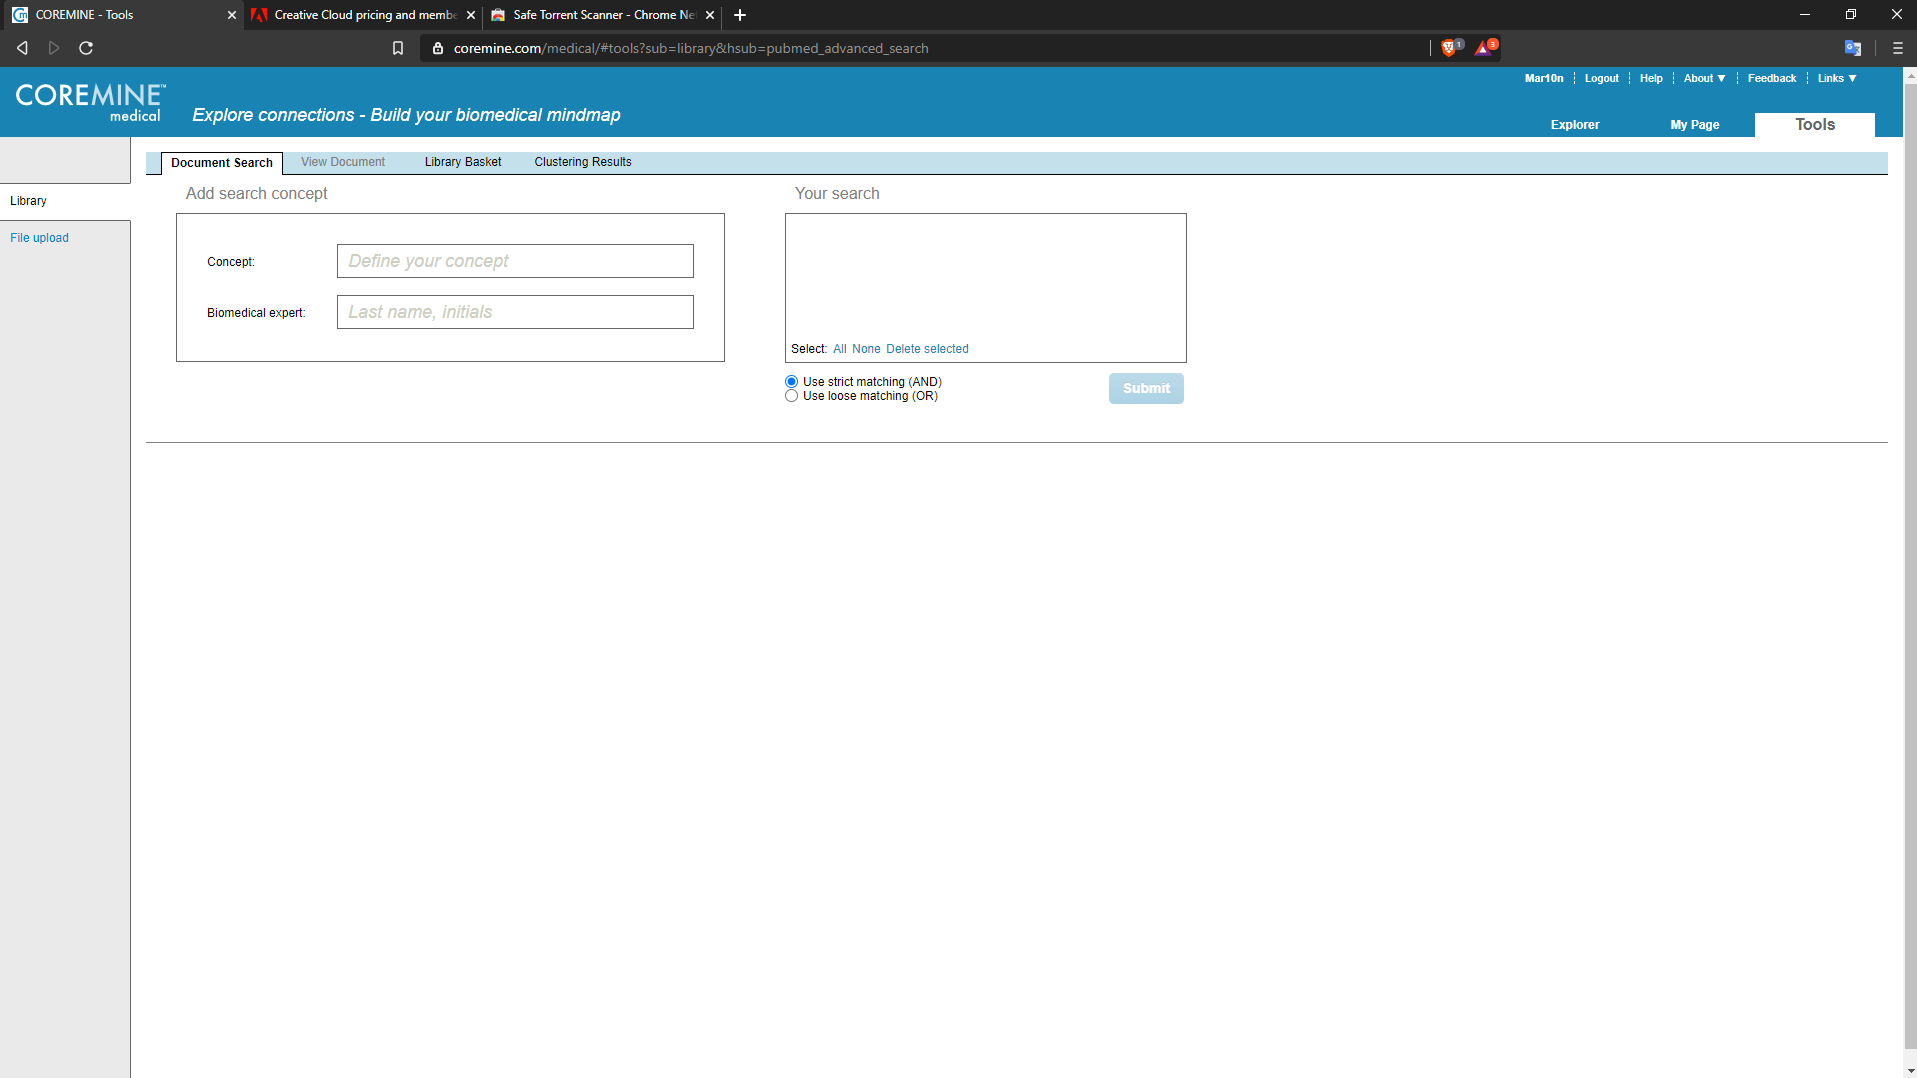
PubMed Search - Search with a concept or Expert name to generate a list of articles
In PubMed Search you can launch a query with one or several Concepts (much as in Explorer Selection). Similarly, you can search with one or several Biomedical expert names. To add Concepts or Biomedical experts to your search, use the submission fields in the box with the heading Add search concept.
The Concept or Biomedical expert list you create will appear in the box headed Your search. Note check boxes allow you to select or deselect concepts and that you can manage the concept list with the All None and Delete selected action links at the bottom of the box.
Notice also that you can filter by journal name or date range by clicking +Add filter and entering filter criteria in the appropriate fields.
Once you have chosen your desired query concepts and filter criteria you can launch the search by clicking the Submit button.
List of articles - View list and select articles for Export
The List of articles panel will open automatically once a PubMed search has been submitted. The panel contains a table showing a maximum of ten article names at a time. At the top of the panel are the action links First, Previous and Next that allow you to page through the table.
The table is comprised of seven columns:
- PMID - The PubMed identification number for the article. Clicking in this column will open the abstract in the View article pane
- Criteria matched - shows which of your search criteria are found in the article
- Year - the year the article was published
- Biomedical expert - the first author listed in the list of authors on the article
- Title - the title of the article
- Link to - opens new browser page with PubMed entry for article
- Add to basket - clicking selects articles to appear in Library basket, indicated by green check mark
The abstract for an article appears in the View article pane after having clicked its PMID in the List of articles table.
In addition to the abstract text, View article shows the article PMID, its Title, its Biomedical expert (first author), the Publication (with volume, issue, etc.) and the Year that it was published.
Other attributes of View article are
- PubMed link out - opens new browser page with PubMed entry for article
- Bookmark star icon - clicking the star icon causes article to be saved in your list of Bookmarks (star will fill with yellow color to show that the articles is bookmarked)
- Add to basket - selects article for export functions
- Show document notes - shows context notes added by users
- Add note - allows you to create a new context note
- Concepts - a table showing concepts recognized from the article abstract and title.
The Concepts table is comprised of two columns: Name and Category. The Name column shows the concept and Category lists the concept type.
Library basket - Import or Export a list of articles or generate Explorer search with concepts found in article list
Functions for importing and exporting lists of articles are found under this Library tool (uploading concepts files is another function discussed in File upload). There are four buttons in the Library actions group at the upper right of the Library pane: Empty; Import; Export; Network.
Empty: Clicking this button simply removes all content from the Library basket. WARNING! There is no undo button for this action. The Library basket may contain hand-picked articles selected from the List of articles pane. In this case you would have to repeat this process to reconstruct the list.
Import: Three file types can be imported to the Library basket:
- EndNote X1-3 XML (.xml)
- EndNote 8-X XML (.xml)
- Comma Separated PubMed IDs
EndNote files are those compatible with the reference management software package of that name (see
https://www.endnote.com/).
You can create comma separated PMID files in a number of ways. These should contain PubMed Identification numbers separated by commas only. When these files are viewed in a text editor they should appear as a column with each row containing only the PMID and a comma, or as a string of PMIDs separated by commas or white spaces, e.g.;
21596533,
21559387,
8725745,
or
21596533,21559387,8725745,
Files should end in .txt or .csv extensions. These can be generated in a number of ways, perhaps most commonly using Microsoft Excel through Save As>Other formats>Save As Type>CSV (Comma delimited)(*.csv).
Export: Library tools can also be used to create lists of articles for export. You can create a list by choosing specific articles from a PubMed search. Do this using Add to basket from the List of articles pane. On opening the Library basket pane you will see the selected articles in a table. Click the Export button to generate a file from the articles selected to the basket. Two types of files can be created in this way:
These file types are compatible with versions of the EndNote reference management software package (see
https://www.endnote.com/).
Files exported as Endnote XML can be re-imported into Library basket, using either the EndNote X1-3 XML or the 8-X setting. XML files are also readable by a number of other software products.
Files exported as Endnote ENW cannot be retrieved to the Library basket.
Network: This function identifies all biomedical concepts found in your collection of articles and uses these to create a new search and concept map in Coremine Medical Explorer. In other words, Coremine Medical searches for recognized concepts within the body of text that you have gathered into the Library basket. It can then launch a new search using the found concepts.
On clicking the Network button you will be able to choose among the following options for network creation:
- Corpus - the body of text to be addressed
- within your input documents
- in Coremine Medical complete documents (Medline)
- Categories - choose which concept types to include
That is, you can choose to launch a search directed only at the articles selected in your list, or send the search to the complete set of PubMed (MEDLINE) articles. Also, you can choose which concept categories (Disease, Drug, etc.) that should be used in the search (as in the Selection feature in Coremine Medical Explorer).
Click the Create button at the bottom of the dialog box once having selected the options you wish to apply to the search. The Explorer pane will open showing a concept map of the concepts extracted from the articles in your Library basket. Clicking on any concept in the network will direct the information in the Focus panel to that concept.
Here you can upload of a tab delimited text file that contains a list of concepts to be explored simultaneously. At present the relevant types of information that can be handled are files that contain lists of gene or protein symbols. Numerical values can also be added to create a data column (e.g. differential expression values from an array experiment) and the file can contain header lines (column labels). File upload allows you to view concepts coupled to these values and to select a subset of concepts to explore. Coremine Medical is currently capable of handling submitted sets of of up to 300 genes or proteins.
File upload and submission of concepts is accomplished in four steps.
- Locate and import file
- Assign header rows, ID and Value columns and settings appropriate for your list
- View table and choose concepts of interest
- Submit the data to Coremine Medical Explorer
Find the file you wish to import on your computer using the Browse button and conventional exploration of directories. Click the "Import" button. The file contents will appear in a table. Select the appropriate options for your files:
- Number of header rows to skip
- Use the first line as the header row
- Organism
- Input type
- ID column
- Data column
- Average value of equal IDs
- Log-2 transform values
Notice that the table contents and column headings will change depending on which selections you make. Click Reset if you wish to start over.
Once you are satisfied that the options chosen are correct for your data, begin selecting concepts to explore. Notice that you can sort the table by clicking on column headings and that there are paging arrows under the table.
After your selections are complete, click the submit button and the Explorer window will open showing the selected concepts as a concept map.